| a_history_of_portraiture.ppt |
Drawing is like making an expressive gesture with the advantage of permanence.
Henri Matisse
Henri Matisse
PORTRAIT DRAWING
Assignment #1: PRE-PORTRAIT
Your first in-class assignment as we begin the portrait unit is to draw a classmate that sits opposite you. No direction will be given, your task is to do your best and create a starting point from which you will grow! This drawing will be collected and saved.
Assignment #2: Video
READ CAREFULLY!! <3
Today you will watch a video and follow along with it to draw a face. If you can't access the video, someone at your table should be able to. Make sure you are logged in to office365. (It also helps if you log in to Gmail with your school email account, then you can access YouTube.)
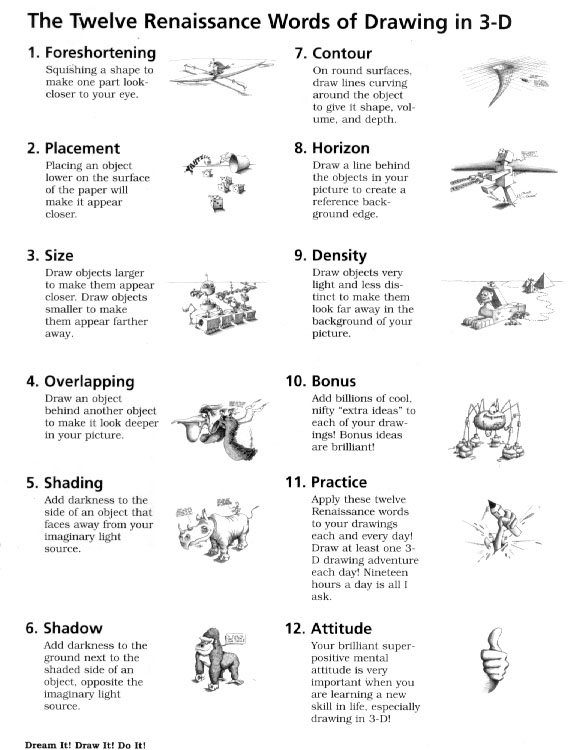
Watch the video below entitled "Sketching a Face: Basic Proportions." Create a drawing as you follow along with the video. If you can't access the video, someone at your table should be able to. GO SLOWLY. It's ok- actually it is REQUIRED!- that you stop the video every minute or so to catch up on what the artist does. You don't need to play the sound.
The idea is that you will be able to see just how capable you are of observing and drawing the basic proportions of the face!
Sign and date this drawing. BE SURE TO TURN IN at the end of class along with the one you did in class yesterday.
VISUAL JOURNAL ASSIGNMENT:
View the Powerpoint and the Video to help you take some notes about the history of portraits in your spread (2 pages facing each other.)
Make sure to also include some notes from the links below about facial proportions. Then make sure to PRACTICE drawing some faces.
Remember to include a title!
See the Powerpoint below for a good definition of a portrait!
| a_history_of_portraiture.ppt |
Good notes for your visual journal spread!
Drawing Theory, Techniques, Skills
Drawing 101
How to Create More Realistic Drawings
Line Drawing
Figure Drawing Practice
The Elements of Art in Drawing
Daily Drawing Challenge Prompts
Drawing 101
How to Create More Realistic Drawings
Line Drawing
Figure Drawing Practice
The Elements of Art in Drawing
Daily Drawing Challenge Prompts
https://monalisaliveshere.files.wordpress.com/2014/01/365-days-of-every-day-drawing-challenge-prompts.pdf
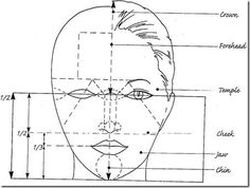
Practice drawing the proportions of the face.
Here are some links that you can use:
Virtual Instructor
Drawing the Face Printable Worksheet- awesome stuff!
Another Step by Step Printable Worksheet (Long!)
Yet ANOTHER Step by Step.... this is a great one to look at.
How to Draw a Realistic Eye (YouTube)
Here are some links that you can use:
Virtual Instructor
Drawing the Face Printable Worksheet- awesome stuff!
Another Step by Step Printable Worksheet (Long!)
Yet ANOTHER Step by Step.... this is a great one to look at.
How to Draw a Realistic Eye (YouTube)
EMAIL your photograph to me
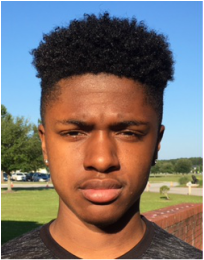
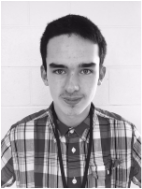
Here are some examples of the kinds of pictures you can use.
DO use a picture that has a wide range of value.
DO use a picture that is somewhat close and cropped.
DO use a picture that has a neutral background. A picture with a busy background will be distracting.
DO use a picture that is recent!
If you can't get a picture to me- I can take it for you!
DO use a picture that has a wide range of value.
DO use a picture that is somewhat close and cropped.
DO use a picture that has a neutral background. A picture with a busy background will be distracting.
DO use a picture that is recent!
If you can't get a picture to me- I can take it for you!
|
|
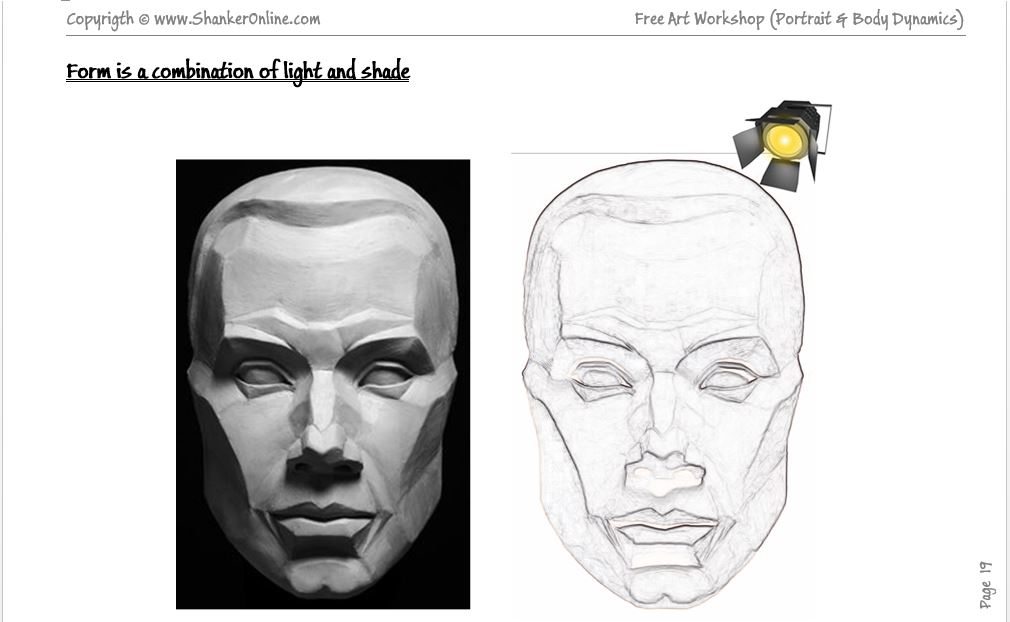
Miss S. took a great picture of herself and cropped it. She sent it to me and I printed it out. She then drew
the grid on the picture and proceeded to draw a grid VERY lightly on her paper. She then copied her image
very lightly and then added modeling (shading) to give the face the three-dimensional illusion.
the grid on the picture and proceeded to draw a grid VERY lightly on her paper. She then copied her image
very lightly and then added modeling (shading) to give the face the three-dimensional illusion.
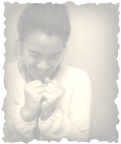
The three pictures below are great pictures to use. You can use a simple pose with extreme lighting, or you can be expressive and make a face! Make sure your face is visible.
|
|
The photos below are not appropriate- this one hides the face.

|

Please don't add anything to your photo like the stickers below.

|

The file size below is too small. It won't print well.
|
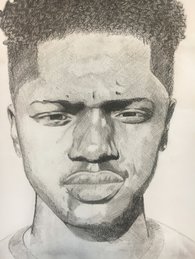
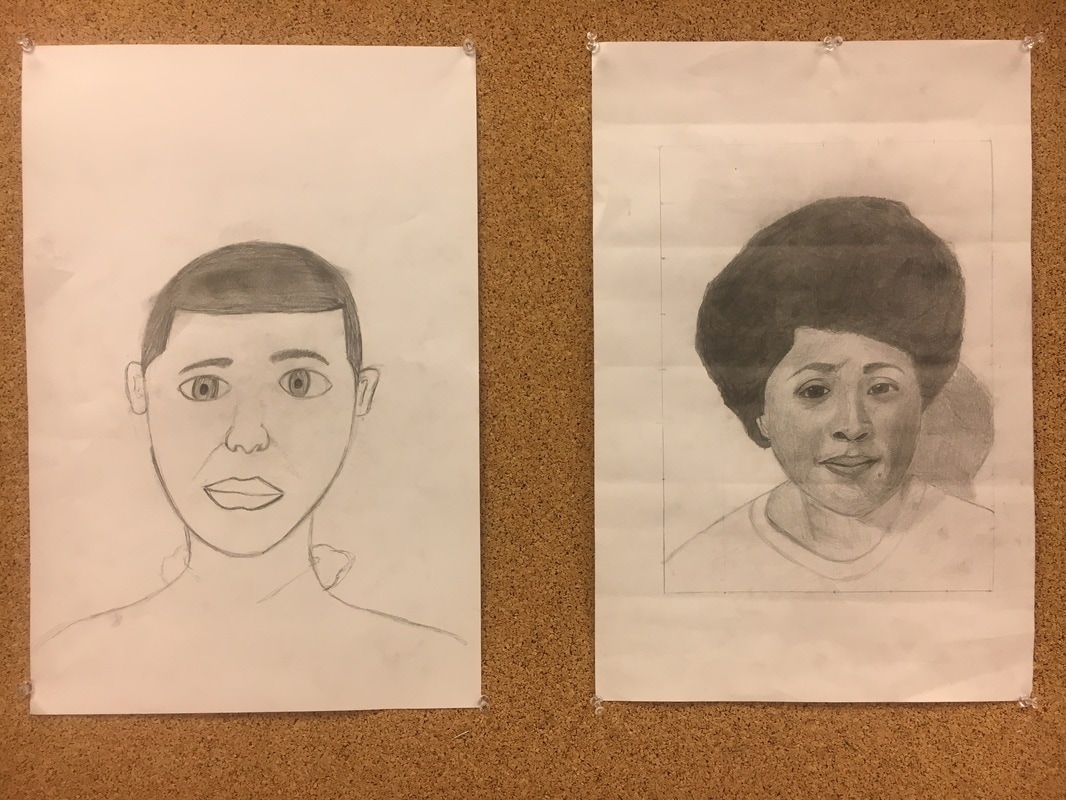
Below- Awesome "before" and "after" drawings by Beginning Art Students!
| proportions_of_the_face_study_guide__1_.pdf |
| art-workshop-lesson-3-human-face-front-pose-grid-technique.jpg |
| art-workshop-lesson-7-3d-human-face-shading.jpg |
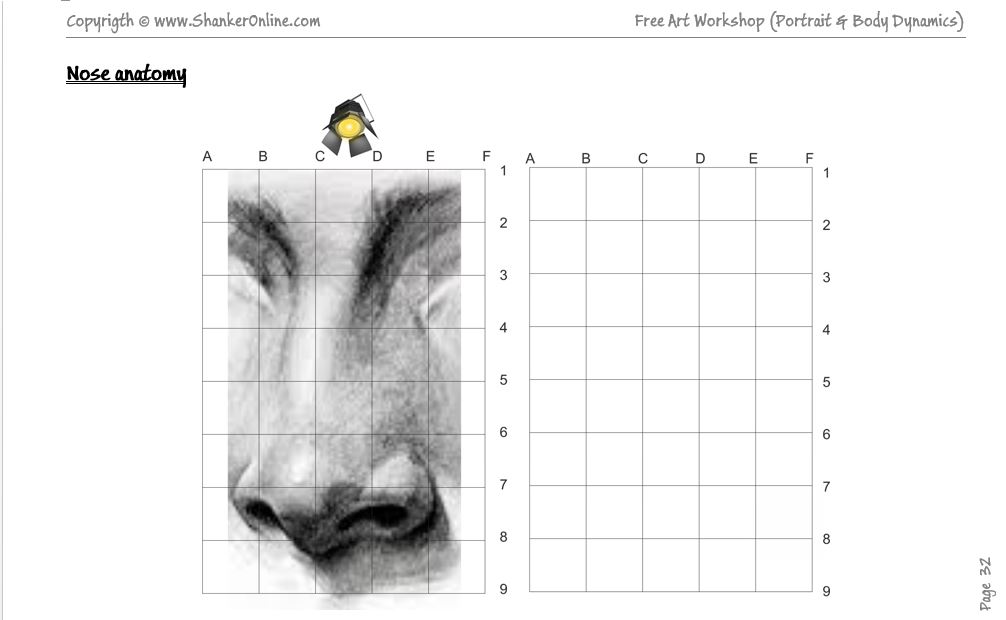
| art-workshop-lesson-21-nose.jpg |
| art-workshop-lesson-17-anatomy-of-ear.jpg |
https://www.artsy.net/article/theartgenomeproject-lesson-plan-number-1-the-portrait
FINAL EXAM Self-Portrait
EXAM Assignment: Create an accurate self portrait pencil drawing from a photograph using enlarged 1:2 (or thereabouts) grid.
RUBRIC FOR FINISHED PORTRAIT
A: Excellent artwork, neat, extremely carefully done, attention paid to making a legible layout and composition, pencil marks are very neatly applied, and blended, and there are perfectly straight neat transitions between the invisible “squares” on the grid, the images were perfectly enlarged on to the grid, time was well spent working on assignment and no time was wasted.
B: Very good artwork, neat and carefully done, composition is readable, although there may be room for a few improvements, pencil is neatly applied and blended, transitions between squares are good but with a little room for improvement, the images were nicely enlarged on the grid, some distraction during work time.
C: Good artwork, adequate understanding of the process, composition is acceptable although there may be some misunderstandings or the grid images were not transferred perfectly…..pencil application is not consistent but is complete, some time was wasted during work time.
D: Poor artwork, messy pencil applications, the images were not adequately transferred on the grid, the artwork may not be completed, a lot of time was wasted on the project.
F: Incomplete or not turned in or poor artwork or very sloppy and messily
completed with no understanding of the grid process.
Drawings need to be complete and turned in by the end of the exam period.
